

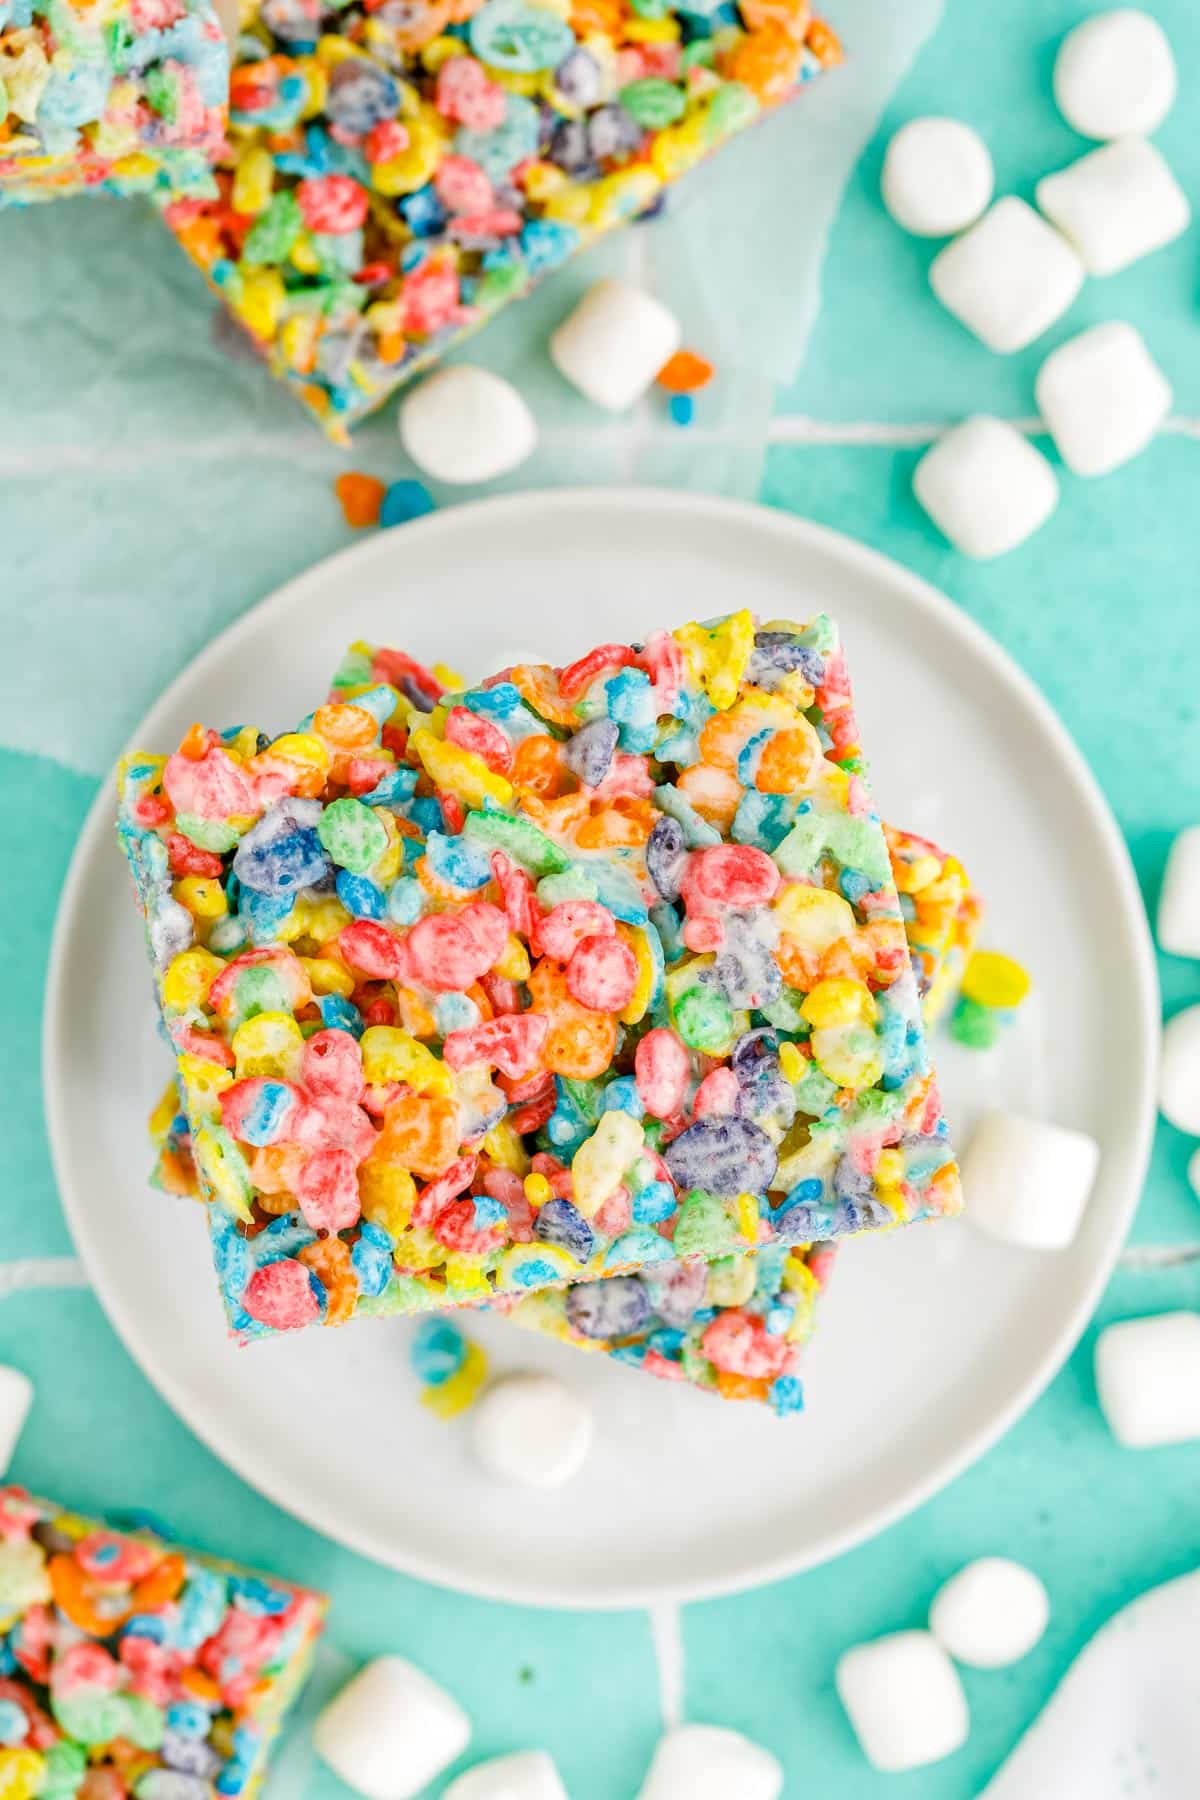
These Fruity Pebbles Treats are a fun twist on the classic Rice Krispie Treat. Grab the kids; they’ll love making them! Plus, all you need is just four ingredients!
The recipe costs about $7.50 to make. It makes twelve servings for approximately $0.62 per serving.
For more fun twists on the classic Rice Krispie recipe, try our Chocolate Rice Krispie Treats and our Heart-Shaped Rice Krispie Treats.
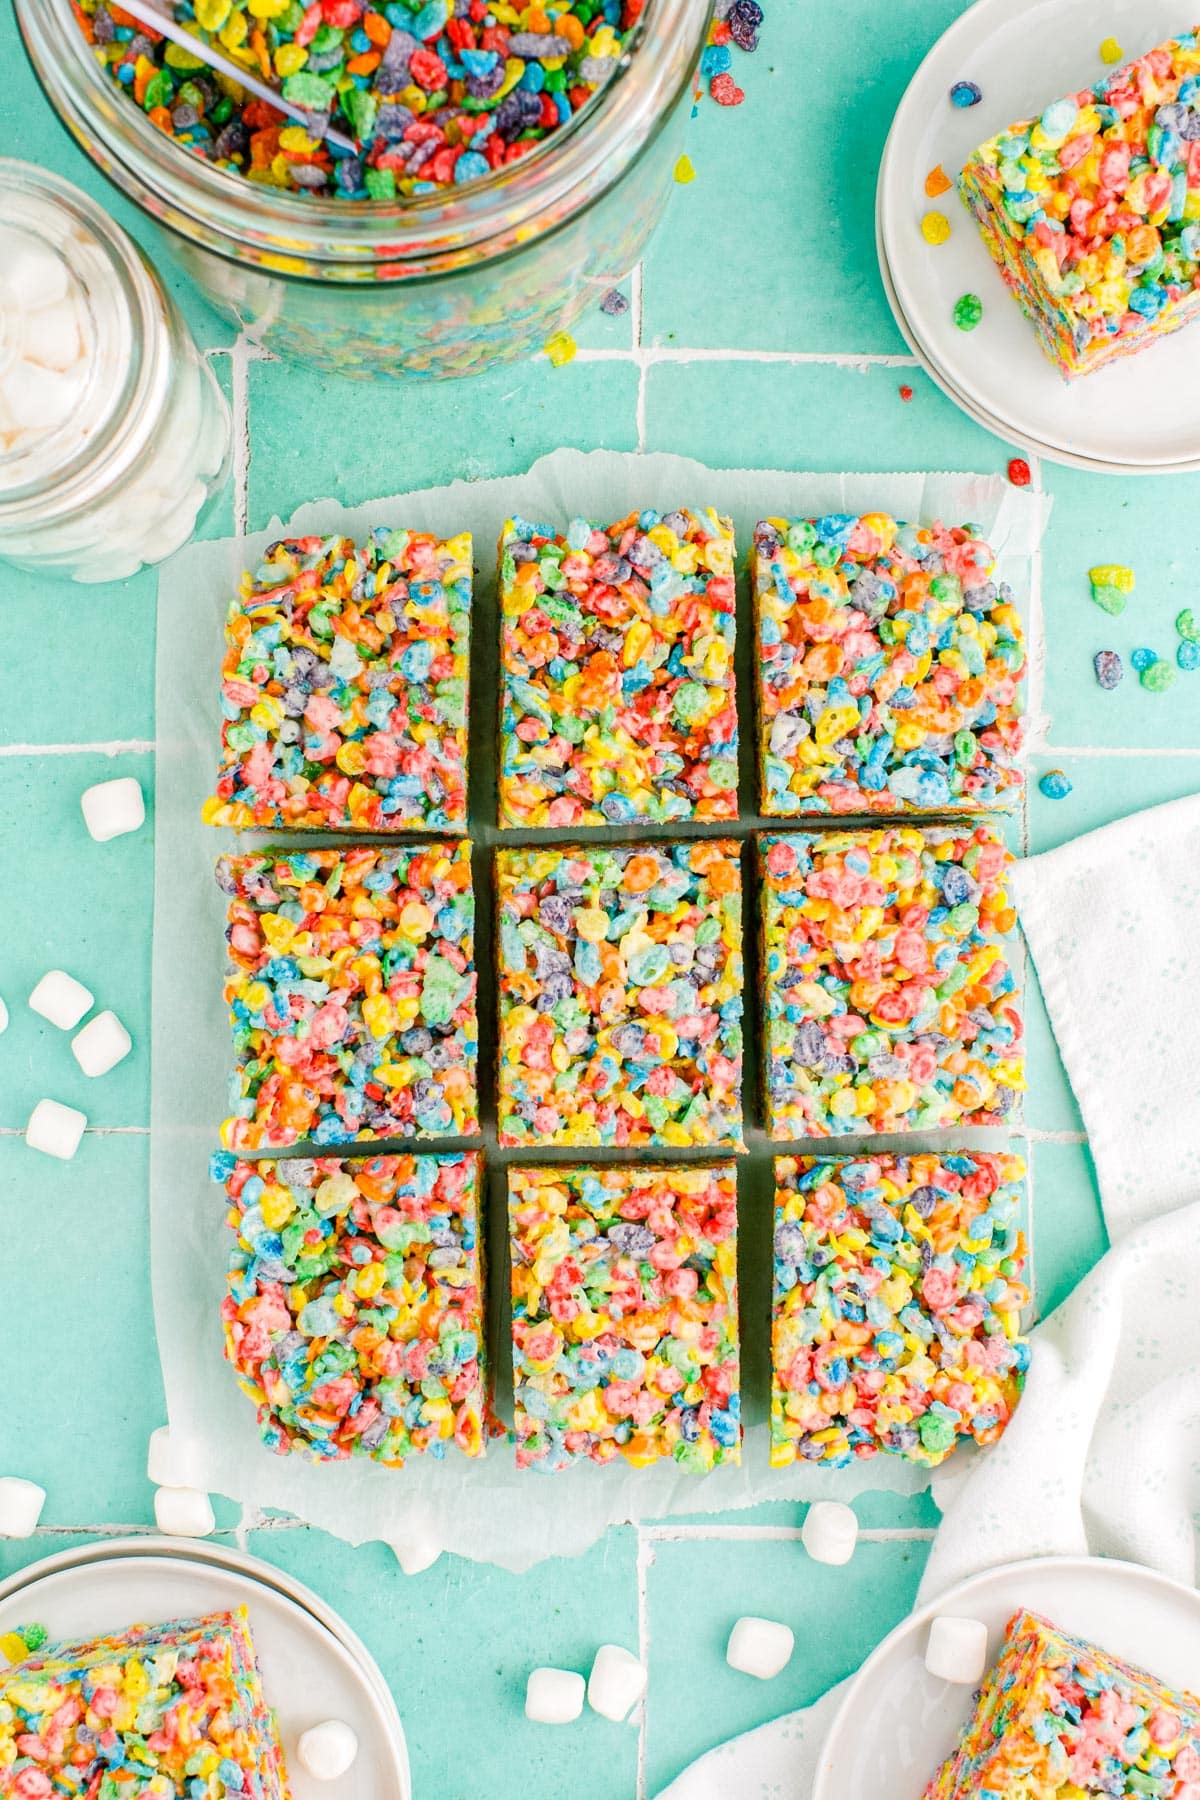
Table of Contents
Fruity Pebble Rice Crispy Treats
We love making these fun no-bake treats for a delicious snack or quick dessert. With this recipe, we take an iconic treat and update it with some fruity cereal.
The colors alone are super fun! But the fruity taste is a yummy bonus. They’re also great for St. Patrick’s Day with their rainbow colors.
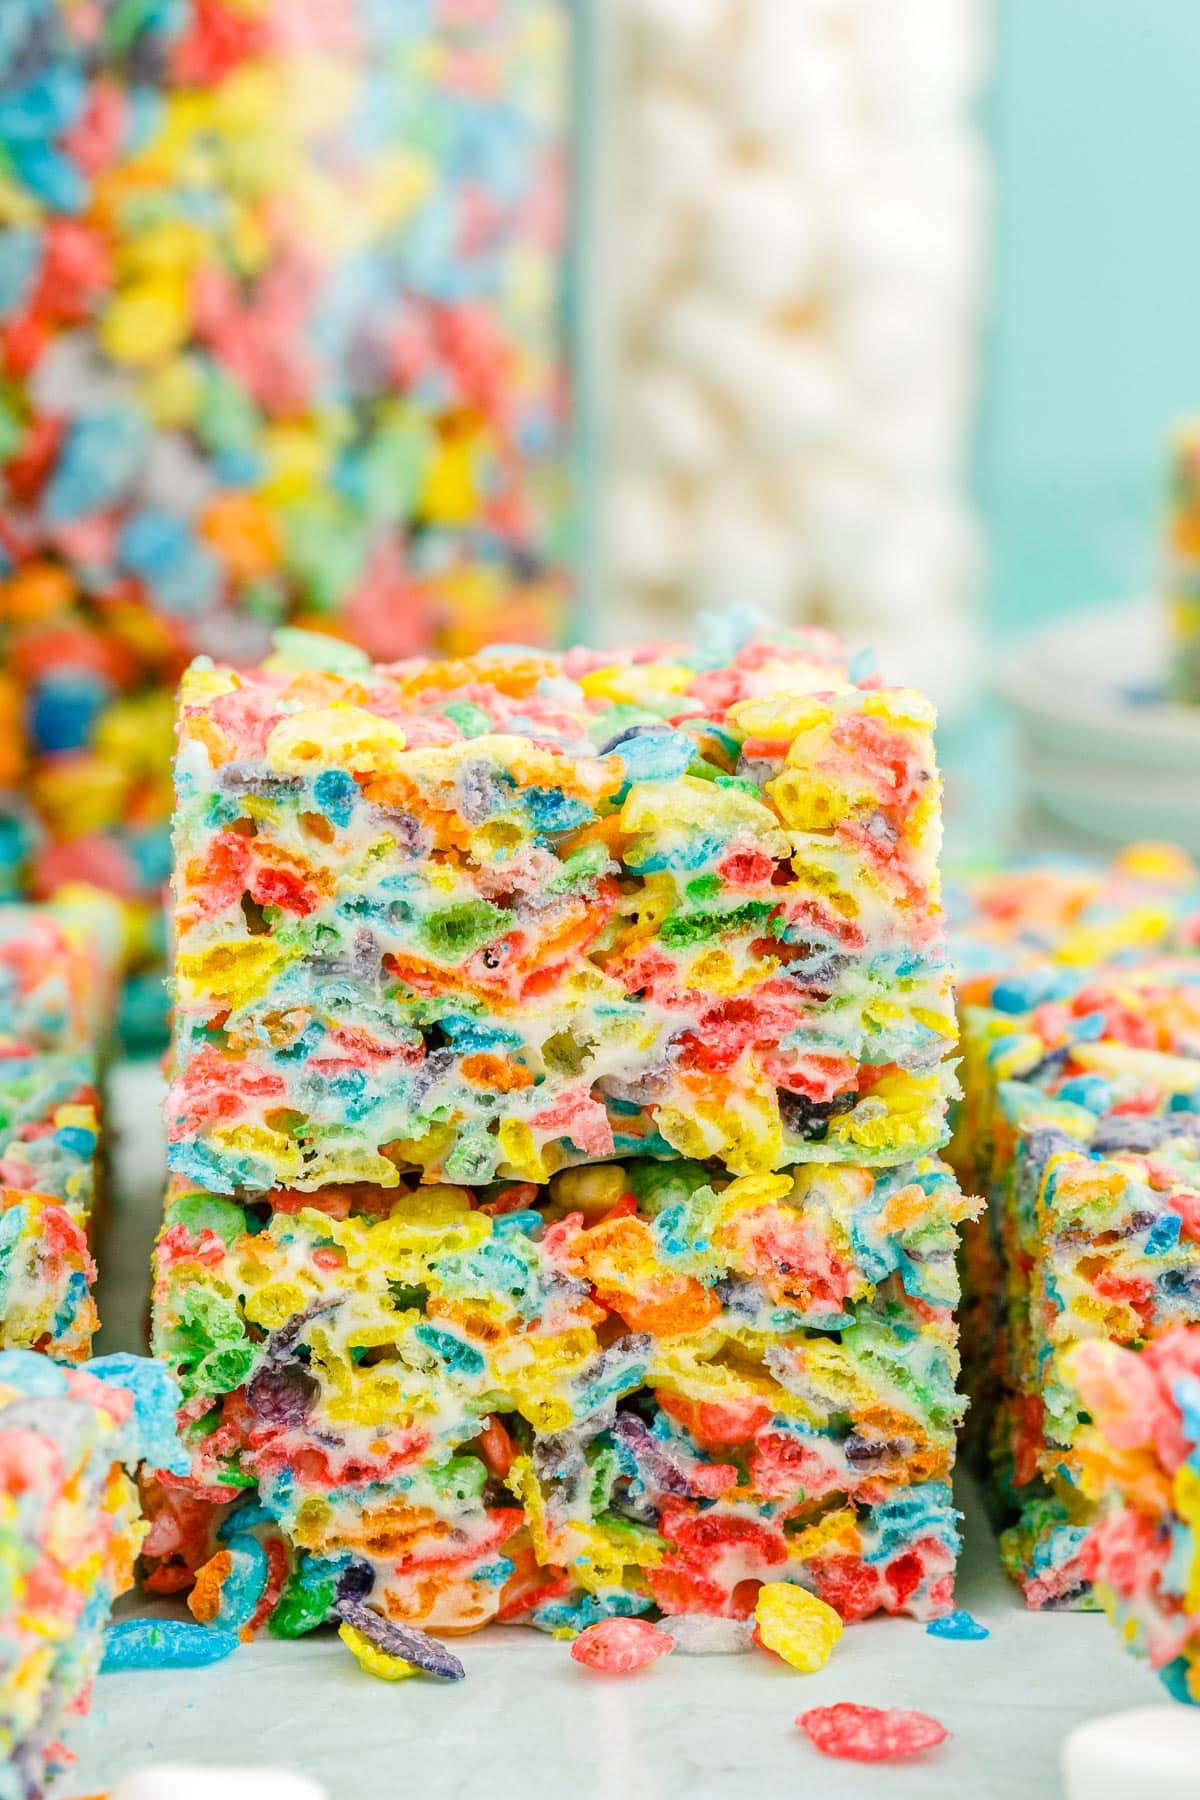
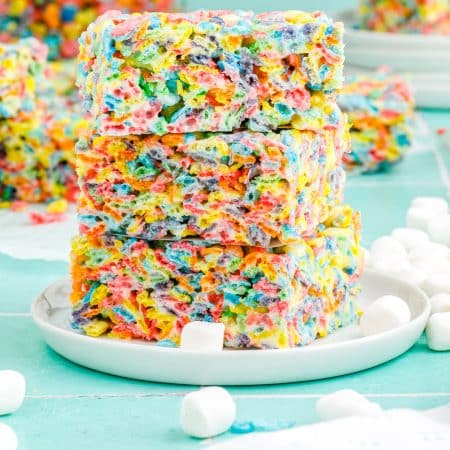
This Fruity Pebbles Treats recipe is soft and chewy. Just the way a rice krispie should be. The gooey marshmallows cover the cereal with the perfect ratio.
These take a few minutes to make, and if you keep the ingredients in your pantry, you can pull them out and make them anytime you need a last-minute snack or dessert. And with a no-bake dessert, there is no need to heat your oven.
Make these Fruity Pebbles Treats today. Whether you make them for yourself, your kids, or your friends, everyone of all ages will love these fun and delicious treats.
Ingredients & Estimated Cost:
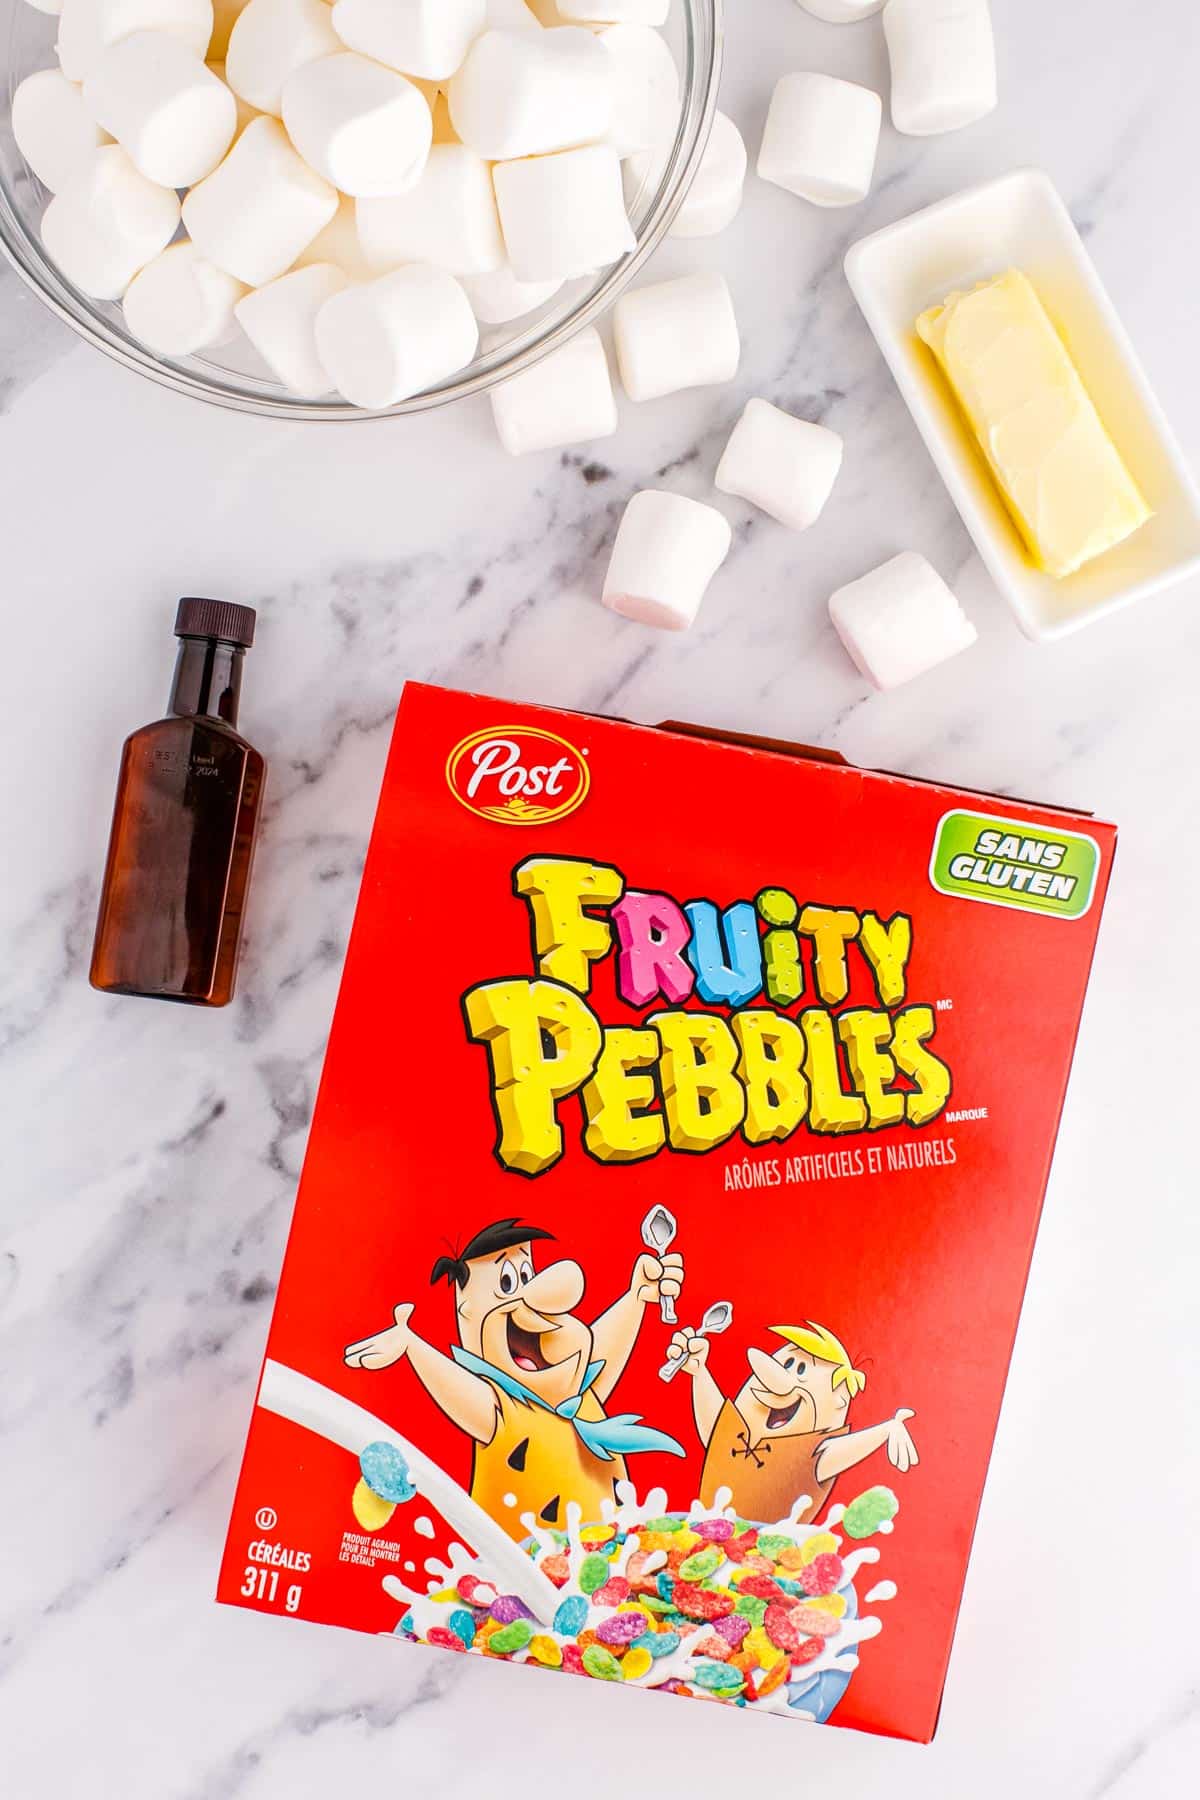
- 11-ounce box of Fruity Pebbles cereal – $3.48
- 16-ounce bag of marshmallows – $2.12
- 10 Tablespoons unsalted butter – $1.40
- 1 teaspoon vanilla extract – $0.50
The recipe cost is calculated by the amounts needed for the recipe. To learn more about how we price our recipes, check out Budget Recipes Explained. The pricing for this recipe was updated in February 2023.
How To Make Fruity Pebbles Treats
***For complete recipe instructions, see the recipe card below.
- First, spray a 9×13-inch baking pan with non-stick cooking spray and then line the pan with parchment paper or tin foil.
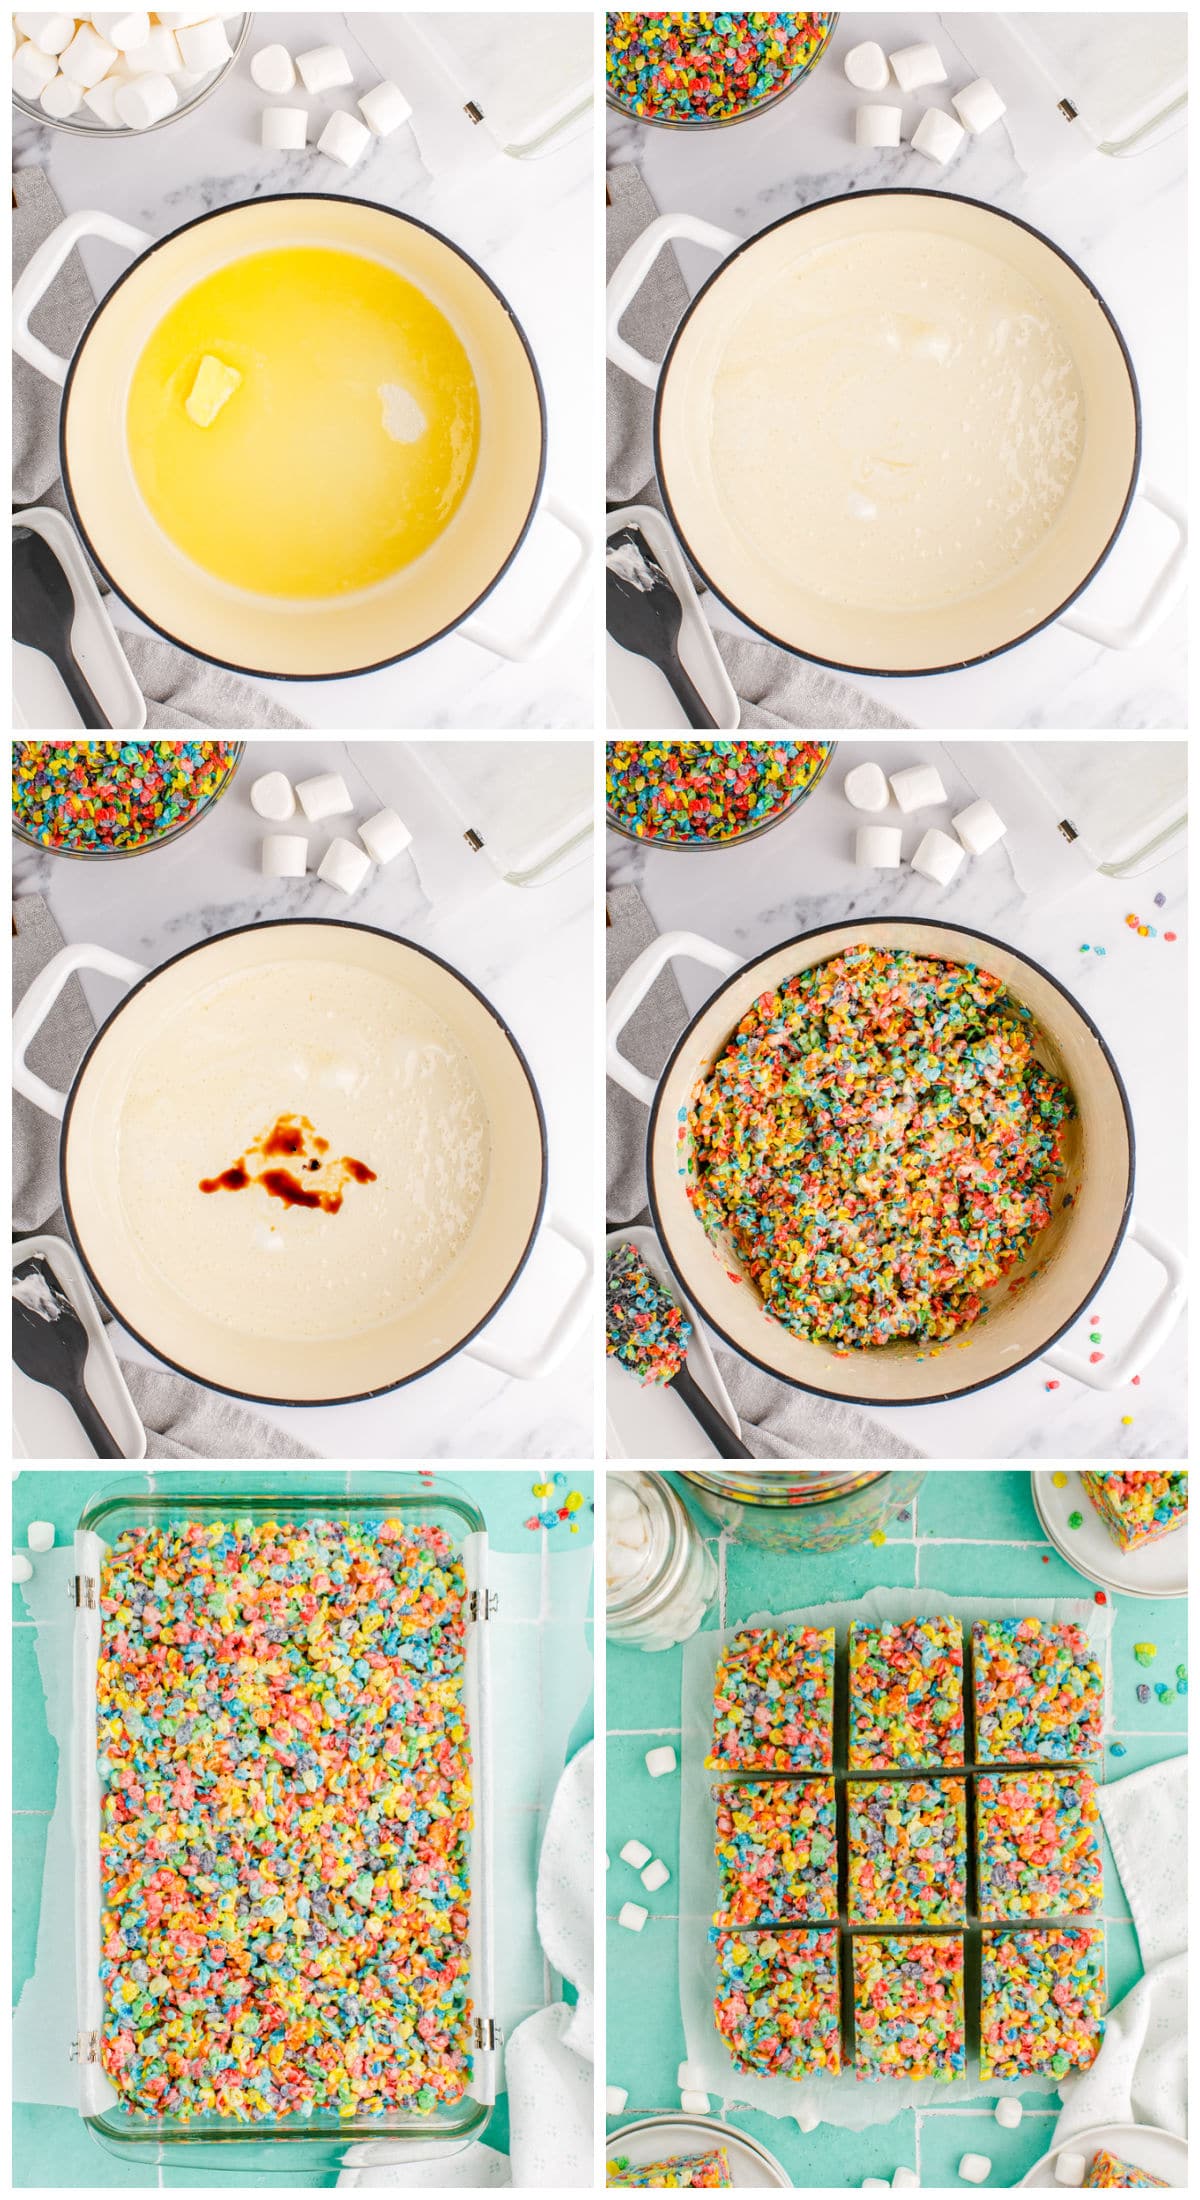
- Next, over medium-low heat, melt the butter in a large pot.
- Then, stir in the marshmallows until melted.
- Remove the pan from the heat and stir in vanilla extract.
- Then pour in the cereal and quickly stir it together.
- Spread the mixture into the pan and press it into the pan.
- Finally, allow the rice krispies to set before slicing and serving.
Recipe Variations and Substitutions
- You can change the flavor profile of these treats by using Cocoa Pebbles instead of the fruity variety.
Storage Tips
SERVE: If you place the rice krispies in the fridge, they will set up quicker to allow you to slice and serve them.
STORE: Store in an airtight container for up to 3 days.
FREEZE: The treats do not freeze or refrigerate well (they dry out and become rock-hard), so we don’t recommend freezing them.
Recipe FAQs
The culprit is generally due to melting the butter and marshmallows over too high heat. It can be tempting to rush the process, but it is worth the few extra minutes to cook it over medium-low heat. These additional minutes help ensure you get soft and gooey Rice Crispy treats.
11 oz of Fruity Pebbles cereal is just about six cups. This is the perfect amount for making a pan of rice krispie treats.
Get Kids Involved
Ages 2-3: Ask your kiddo to help pour in the marshmallows as you stir them into the melted butter. They can also practice counting skills as you cut the Rice Krispies into squares.
Ages 4-5: Teach your child how to measure butter sticks to count out ten Tablespoons of butter to put in the pot to melt.
Ages 6-8: Ask your child to pour and mix the ingredients. This is an excellent recipe for them to learn to master and make on their own as they develop their skills in the kitchen.
Ages 9-11: Supervise them while they prepare the entire recipe. Remember to have them read it twice before beginning the recipe.
Ages 12+: Let them prepare the entire recipe unsupervised while you do the happy dance in the corner!
Budget Tips
We like to look for sales on butter, marshmallows, and Fruity Pebbles cereal and then stock up when they go on sale, so it is even less expensive to make this recipe.
More No-Bake Desserts
- Grandma’s Homemade Chocolate Syrup
- Chocolate Peanut Butter Bon Bons
- Cream Cheese Fruit Dip Recipe
- No-Bake Oreo Cheesecake
- Oreo Ice Cream Cake
- Easy Cake Pops – Donut Hole Cake Pops
- No-Bake Chocolate Peanut Butter Oatmeal Bars
- No-Bake Chocolate Oat Cookies
- Snickers Salad
- No-Bake Cherry Chocolate Cheesecake
Fruity Pebbles Treats
 Recipe Cost 7.50 Serving Cost 0.62
Equipment
- 9×13-inch baking dish
- Wooden mixing spoon
- large pot
- Measuring spoons
Ingredients
- 11 oz box Fruity Pebbles cereal
- 16- ounce bag marshmallows mini or regular
- 10 Tablespoons unsalted butter
- 1 teaspoon vanilla extract
Instructions
PREP PAN:
- Spray a 9×13-inch baking pan with non-stick spray and line with parchment paper or foil.
MAKE TREATS:
- Melt the butter in a large pot over medium-low heat. Before the butter is fully melted, add marshmallows and stir often until melted.
- Remove the pan from the heat and stir in vanilla extract.
- Pour in the cereal and stir well. Note: do this quickly because as the marshmallow starts to cool, they will get much stickier.
POUR INTO PAN:
- Pour or scoop the mixture into the pan and spread as quickly as possible. Note: If you spray some non-stick spray on your spatula or hands, it will help with the stickiness of the marshmallows. Press firmly to compact with your hands or parchment paper.
- Allow them to cool and fully set before slicing them into bars with a sharp knife.
Notes
- Store in an airtight container for up to 3 days.
- If you place them in the fridge, it will make them set up quicker.


Amanda says
This Fruity Pebbles Treats recipe is genius. Simple ingredients, extraordinary results.
Dannii says
These were so much fun to make and my kids loved them.
Kushigalu says
What a delicious colorful treat to try. My kids will love these.
Jill says
These are like if a rice krispie treat got crossed with a rainbow! So cute. Decided to make these with my kids and they loved the fruity flavor.
Sara Welch says
Such a fun and tasty treat that does not disappoint! Will be perfect to hand out as Valentine’s gifts this year; easily, a new favorite dessert!
Jeff says
It he colour and crunch. The kids are happy too.