

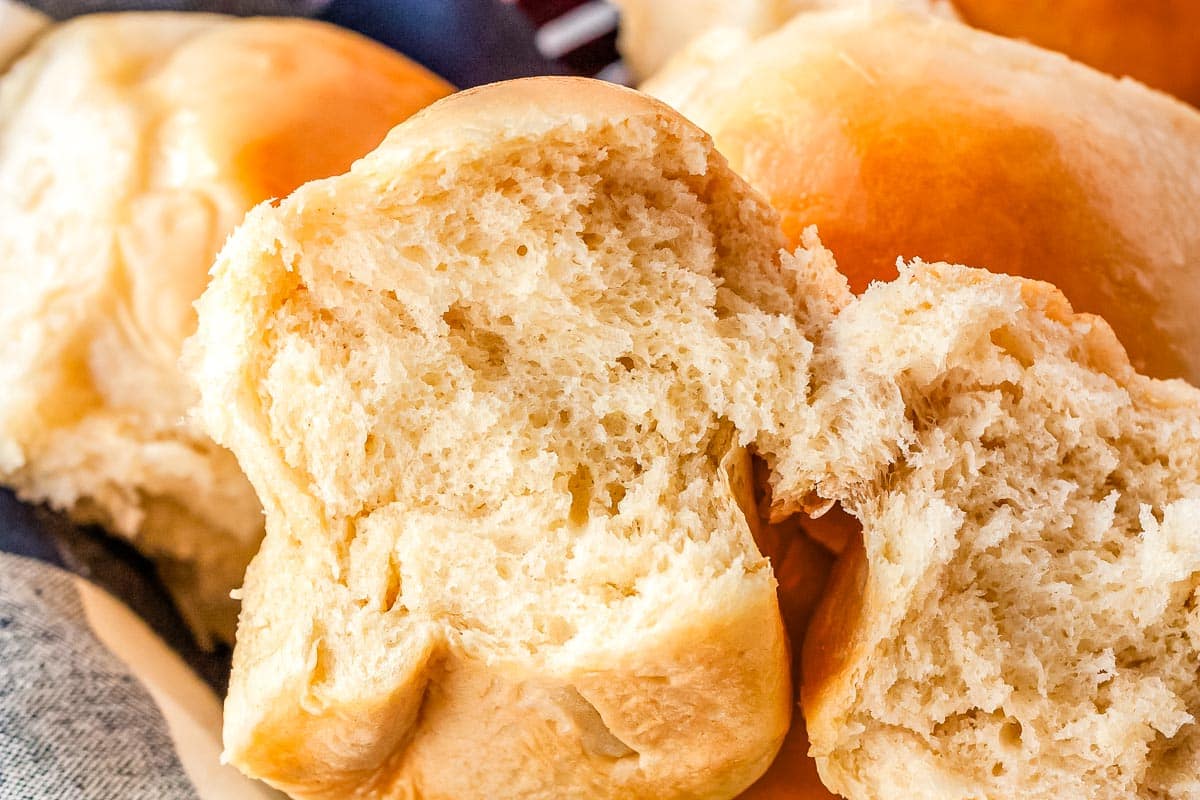
I always skip complicated bread recipes and make these 1-Hour Dinner Rolls instead! They’re ready in a flash, giving me 30 warm, fluffy, homemade rolls without the hassle. Quick, easy, and delicious, they’re the perfect addition to any weeknight meal or holiday dinner.
It costs approximately $3.32 to make these rolls. The cost per serving is about $0.12.
I heard your requests for more quick and delicious bread recipes, so I created these fantastic 1-Hour Dinner Rolls. Get ready to transform your weeknight meals with warm, fluffy rolls in just 60 minutes!
They’re so easy to make; you can whip up a batch any day of the week, not just holidays. Now, you can enjoy delicious homemade bread whenever you want. This recipe yields a whopping 30 rolls, perfect for feeding a crowd.
And the best part? You can freeze leftovers for future meals (see freezing instructions below).
Table of Contents
Why I Love These 1-Hour Dinner Rolls
- Quick and Easy: This recipe comes together in under an hour, with simple steps and minimal waiting time. Perfect for busy weeknights!
- Large Batch: It yields 30 rolls, ideal for feeding a crowd or freezing leftovers.
- Freezer Friendly: Leftover rolls can be frozen for future enjoyment, making them a great meal prep option.
Ingredients & Estimated Cost:
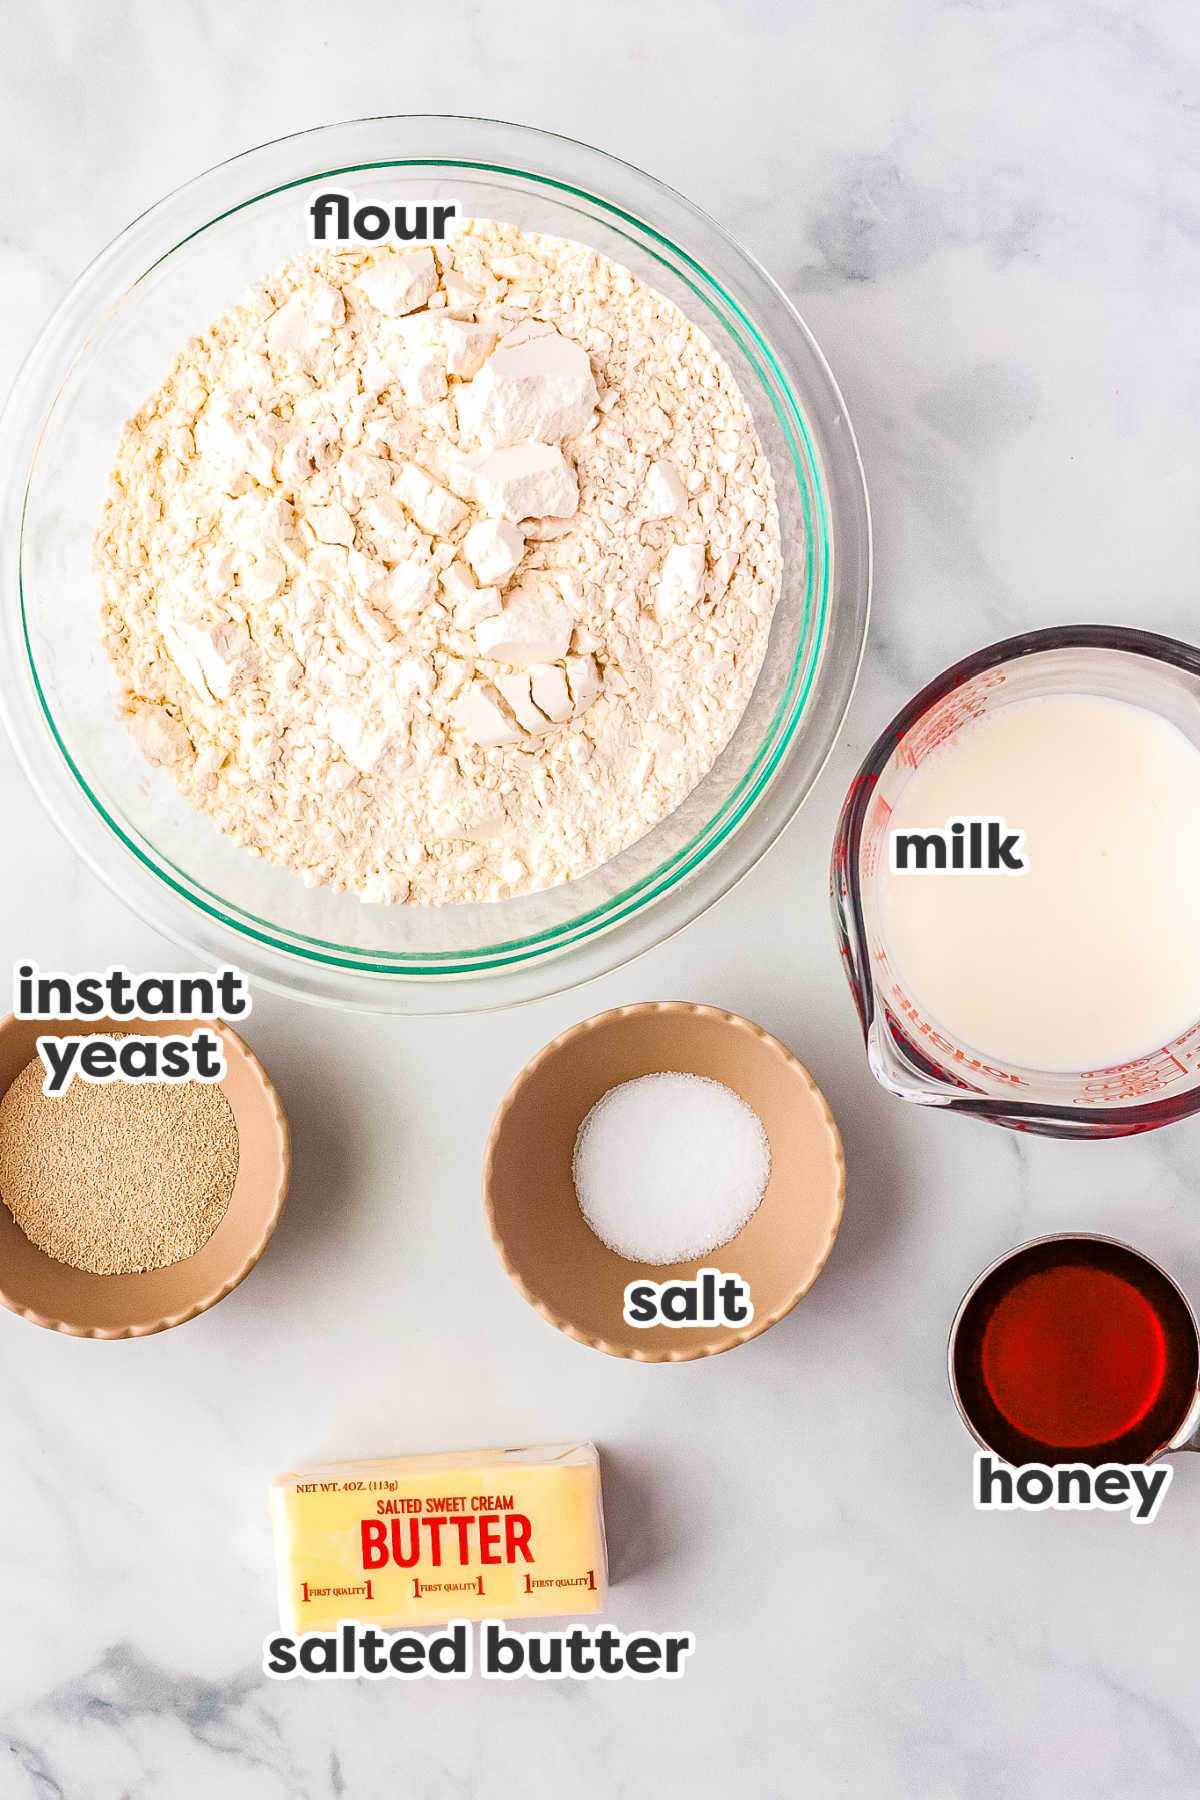
To make these one-hour dinner rolls, you’ll need just seven pantry ingredients.
- 2 cups water – $0
- 1 cup milk – $0.14
- 8 Tablespoons butter – $0.80
- ¼ cup honey – $0.66
- 2 Tablespoons instant yeast – $0.18
- 7-8 cups all-purpose flour – $1.52
- 2 teaspoons salt – $0.02
The recipe cost is calculated by the amounts needed and will vary based on fluctuating grocery costs. To learn more about how we price our recipes, check out Budget Recipes Explained. The pricing for this recipe was updated in June 2024.
Equipment
- large liquid measuring cup
- instant-read thermometer
- whisk
- stand mixer with dough hook
- large mixing bowl
- dish towel
- rimmed baking sheet
- small microwave-safe bowl
- pastry brush
How To Make 1-Hour Dinner Rolls
Each number matches up with the numbered steps below.
Prep the Dough (5 minutes)
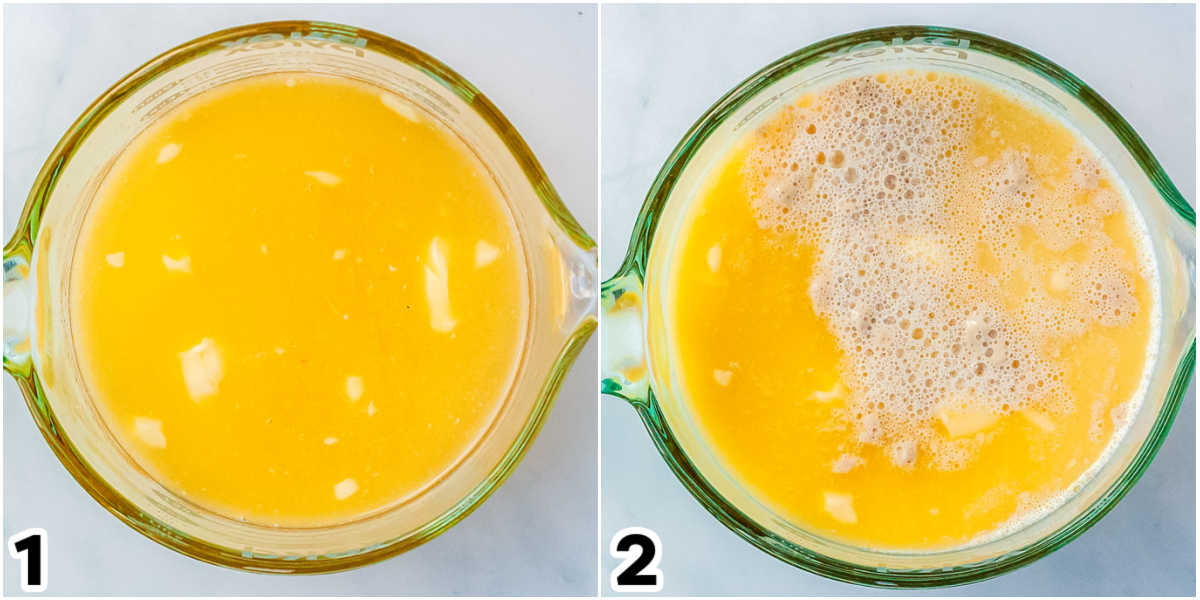
- In a microwave-safe bowl, combine water, milk, butter, and honey. Microwave for 1 minute, then in 15-second intervals until warm (100-110°F) and butter is melted.
- Add the yeast and let it sit for 5 minutes. Transfer to the bowl of a stand mixer.
Mix and Knead the Dough (22 minutes)
- Add flour and salt to the stand mixer and mix with the dough hook until combined. Gradually add flour, ¼ cup at a time, until the dough pulls away from the sides (about 5 minutes).
- Knead into a ball and place in a greased bowl. Cover the dough with a damp towel and let rise in a warm place for 20 minutes.
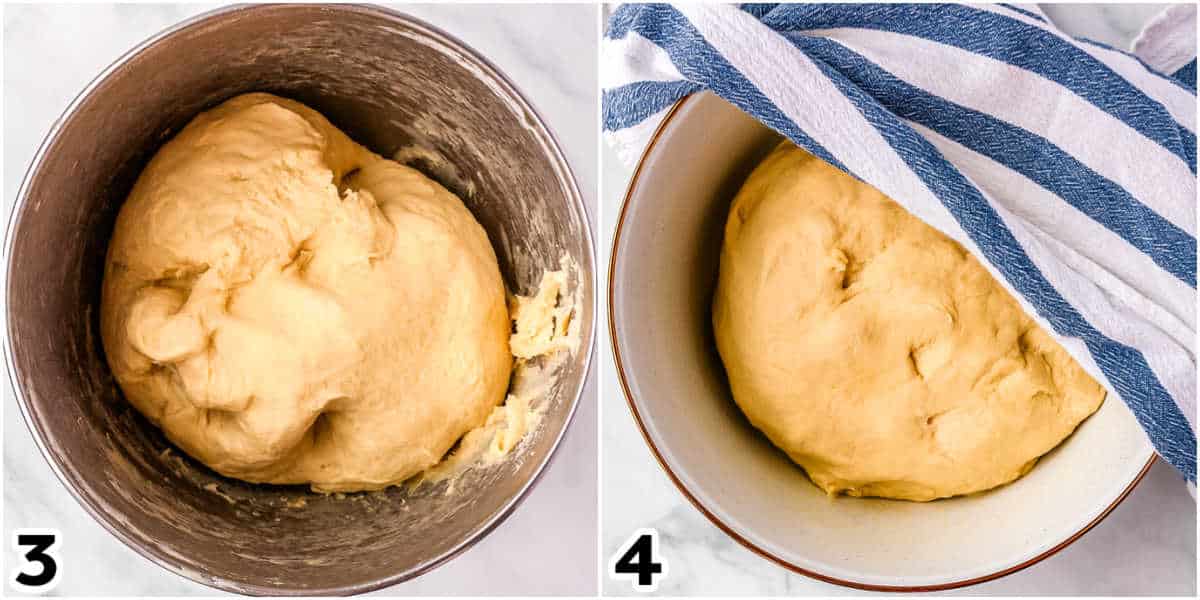
Rise, Shape Dough, and Second Rise (18 minutes)
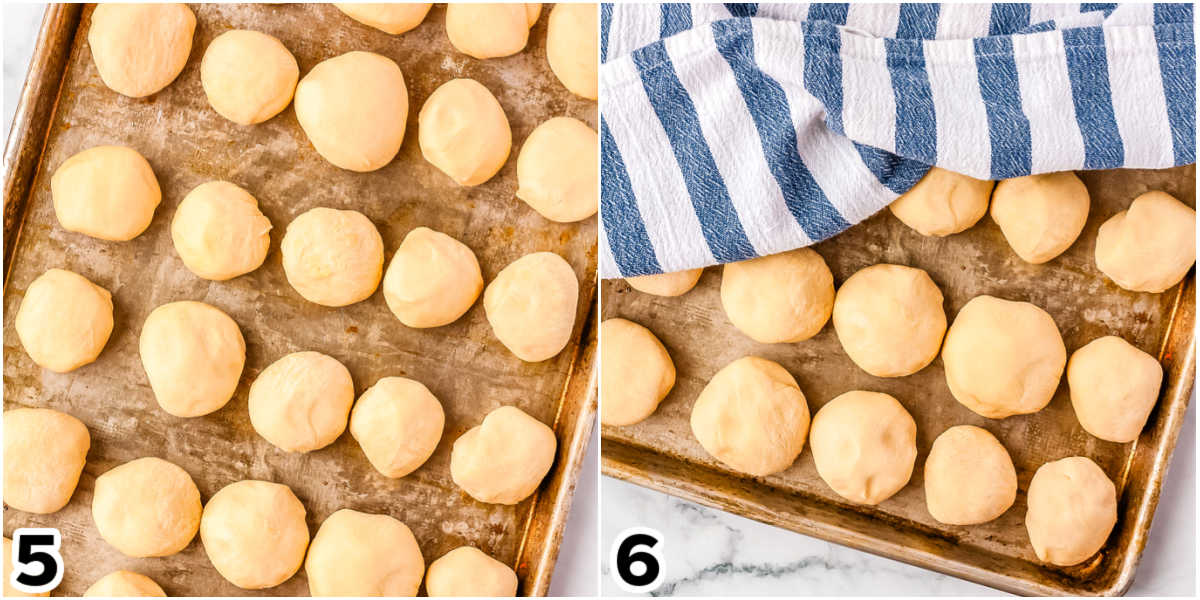
- Punch down the dough and divide it into 30 pieces. Shape each piece into a ball and place them on a greased baking sheet.
- Cover with a damp towel and let rise for 15-20 minutes.
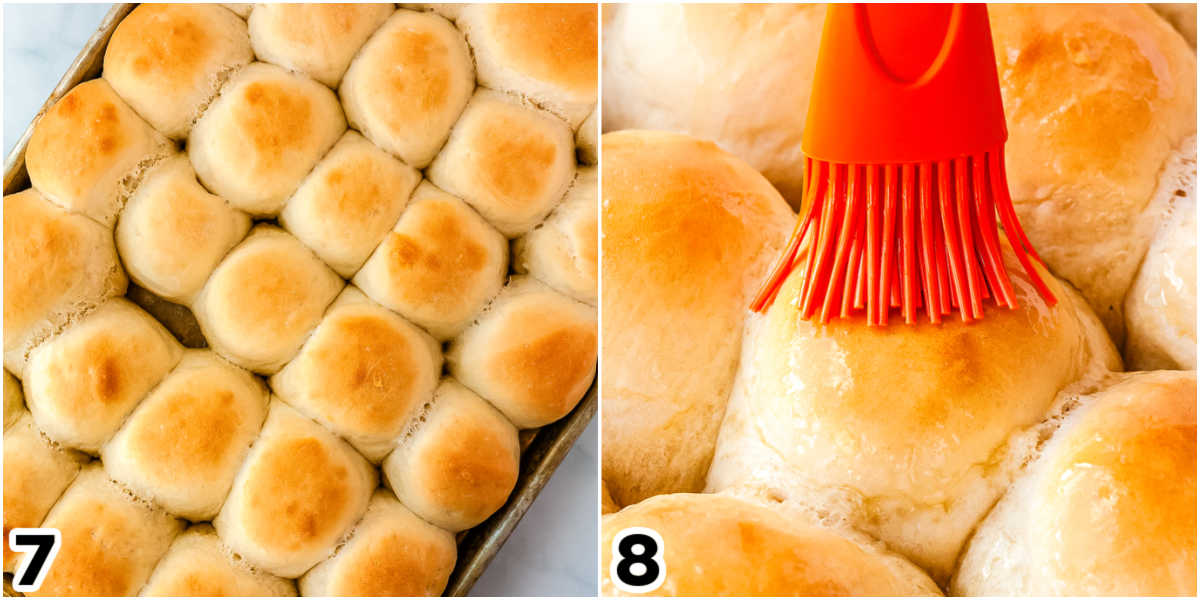
Bake and Serve (15 minutes)
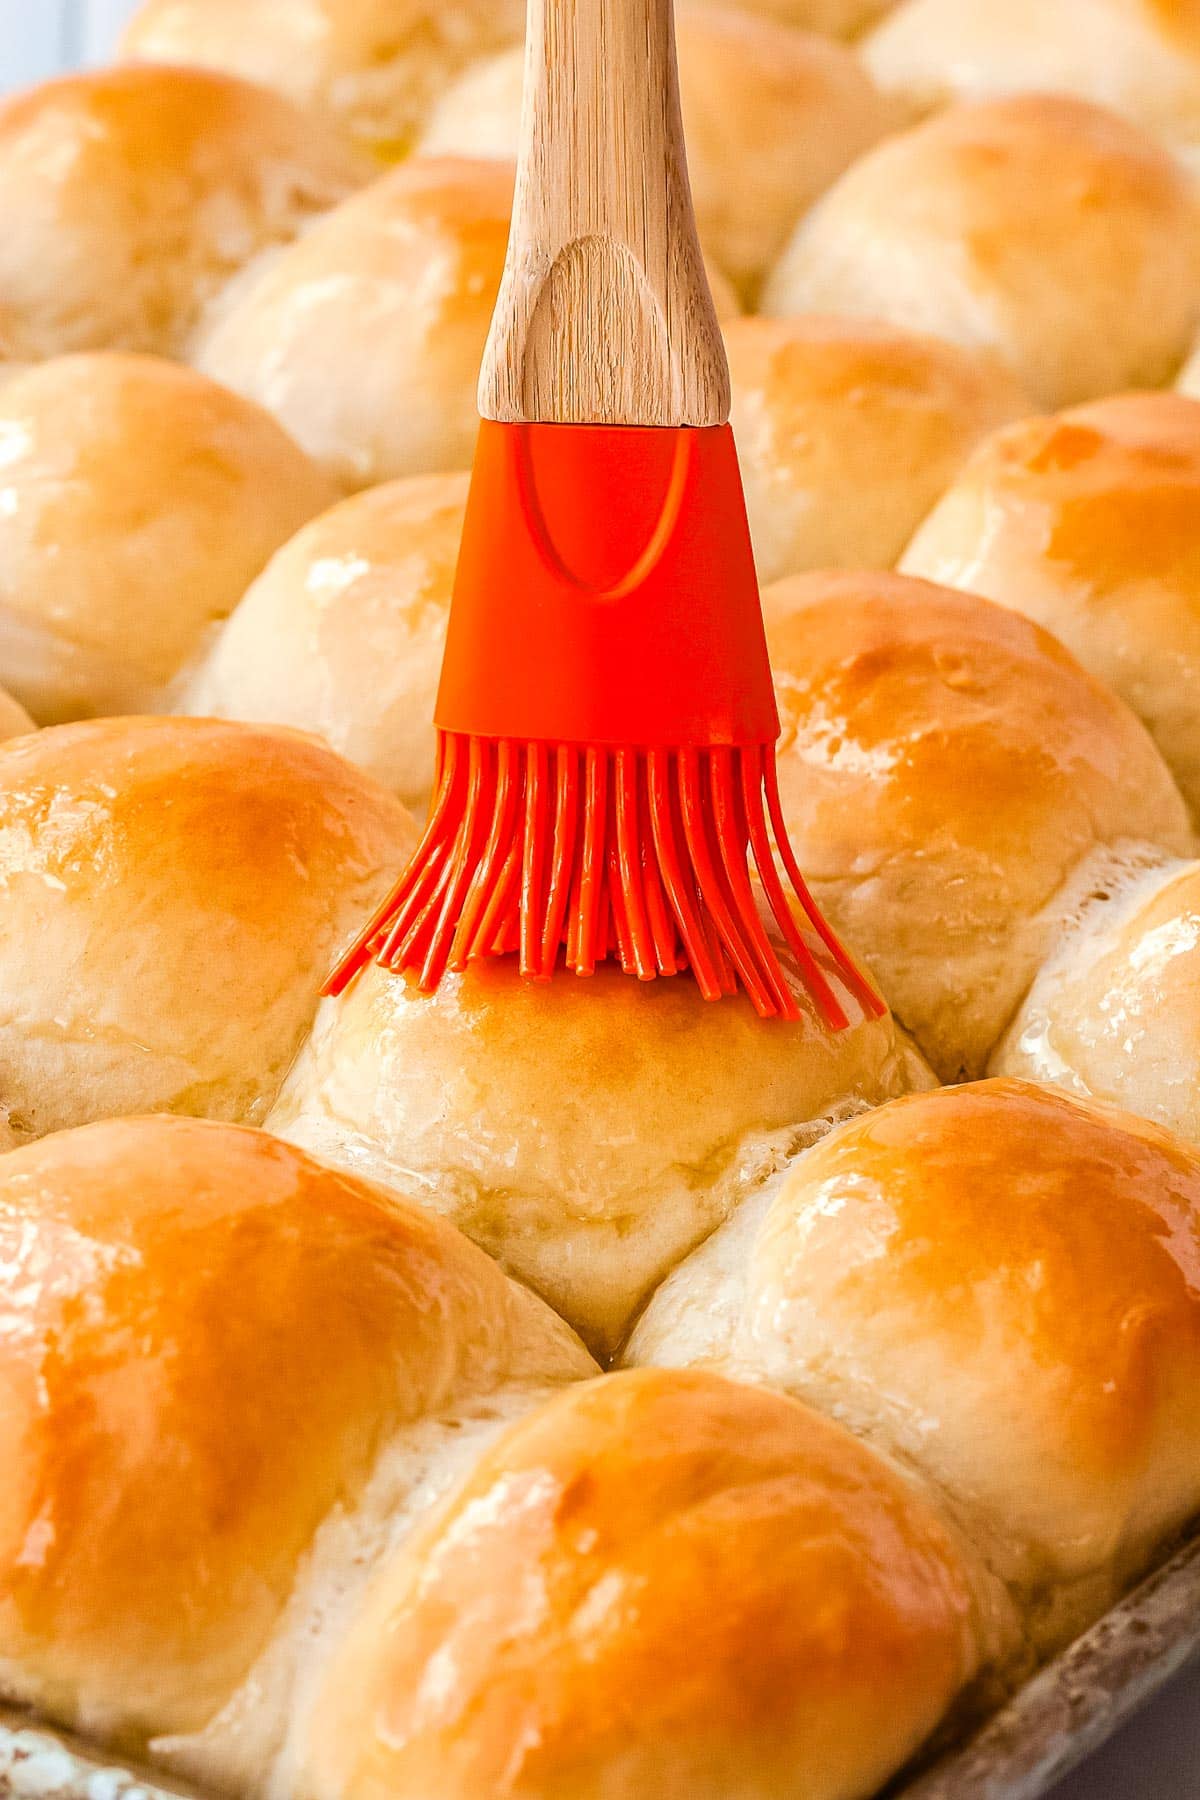
- Bake for 15 minutes.
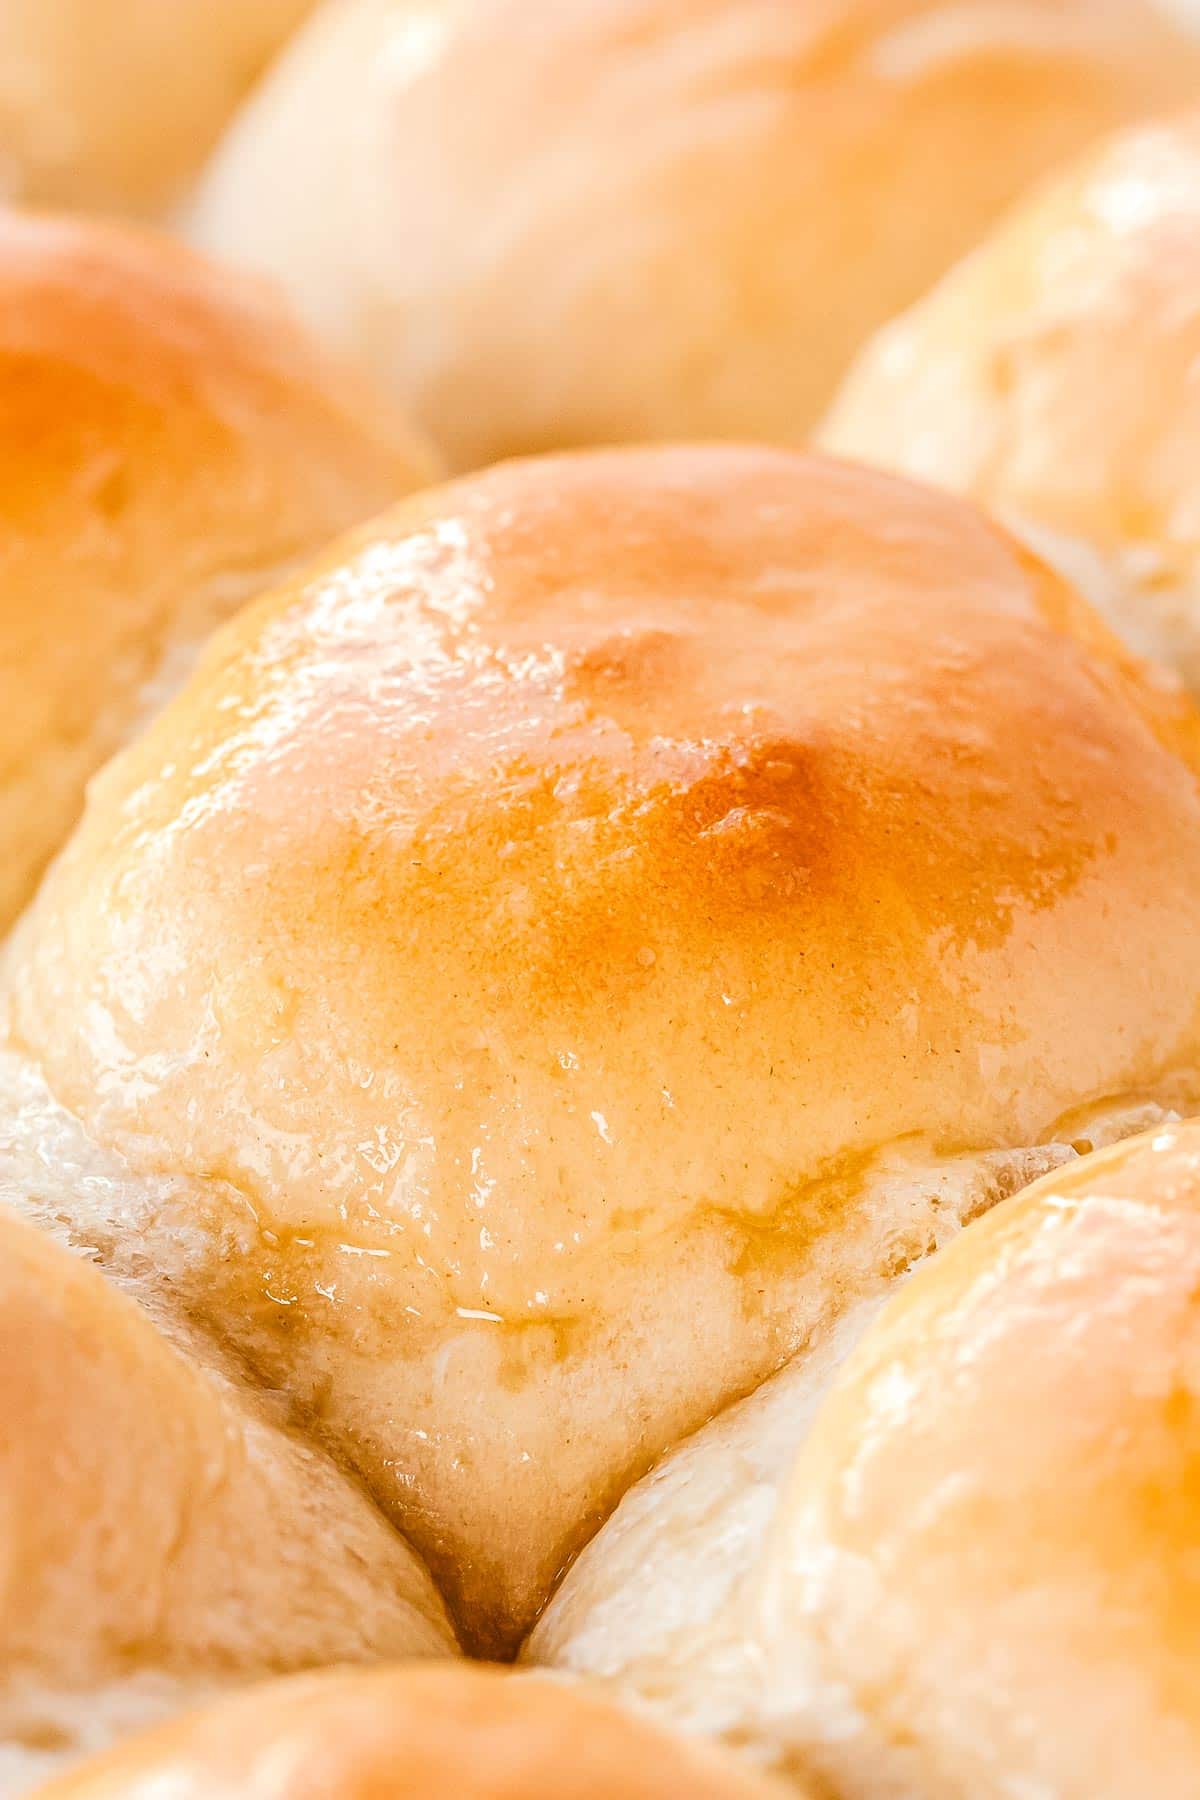
- Then, brush with melted butter and serve warm.
***For complete recipe instructions, see the recipe card below.
Cooking Tips
When adding flour, be mindful not to add too much. You want the dough to be slightly tacky, but not sticky. If it becomes too dry and difficult to handle, add a tablespoon of water at a time until it reaches the desired consistency.
Recipe FAQs
We have an easy hack for keeping dinner rolls warm in 3 easy steps.
1. Preheat beans: Heat one cup of dry beans in a microwave-safe bowl for 1-2 minutes or until warm to the touch.
2. Add beans: add the beans at the bottom of a bread basket.
3. Add towel and the rolls: Add a clean napkin or kitchen towel to the top of the warm beans. Add the rolls to the bread basket to keep warm until serving.
I am sure you could do it with the bread maker, but I have not personally tried it yet. It makes a lot of dough, so it may not all fit in a bread maker,
Yes, you can cut the recipe in half. You will bake them in a 9×13 inch pan for the same time, 15-18 minutes.
Storage Tips
SERVE: For maximum warmth, bring these rolls straight from the oven to the table! Keep them nestled together on the pan to trap the steam and ensure fluffy rolls throughout the meal.
STORE: Let the rolls cool completely, then separate them for storage. Place them in airtight Ziploc bags and store at room temperature for up to 3 days.
REHEAT: Preheat your oven to 350°F (175°C). Place the rolls in a paper bag, fold the top closed, and sprinkle about 1 tablespoon of water over the bag. This creates a steamy environment to revive the rolls. Reheat for 5-6 minutes, or until warmed through.
FREEZE: Once completely cool, wrap them tightly in foil and place them in a labeled freezer bag. They’ll keep for up to 1 month. To thaw, remove them from the freezer and let them defrost at room temperature. Then, reheat using the method above.
More From Easy Budget Recipes

1 Hour Dinner Rolls
 Recipe Cost 3.32 Serving Cost 0.12
Equipment
- large liquid measuring cup
- instant-read thermometer
- whisk
- stand mixer with dough hook
- large mixing bowl
- dish towel
- rimmed baking sheet
- small microwave-safe bowl
- pastry brush
Ingredients
- 2 cups water
- 1 cup milk
- 8 Tablespoons butter divided
- ¼ cup honey
- 2 Tablespoons instant yeast
- 7-8 cups all-purpose flour
- 2 teaspoons salt
Instructions
- Add water, milk, 4 Tablespoons of butter (cut into 8 pieces), and honey to a 4-cup measuring cup or small microwave-safe bowl.
- Microwave for 90 seconds, and then 15-second intervals, until the butter is melted and the mixture is between 100-110 degrees F.
- Whisk the yeast into the mixture and let it sit for 4 minutes. Then, pour the mixture into the bowl of a stand mixer (you’ll need to use a rubber scraper to get the settled honey from the bottom of the measuring cup).
- Add 7 cup of flour and salt to the stand mixer. Mix with the dough hook on low speed until the flour is absorbed into the wet ingredients. Keep adding more flour, ¼ cup at a time, until the dough pulls away from the sides of the bowl and the dough is not sticky, just slightly tacky.
- Knead on medium speed for 3 minutes. Then, transfer the dough to a large greased bowl.
- Cover the dough with a clean kitchen towel, and let the dough rise for 20 minutes.
- Grease a standard rimmed baking sheet (18”x13”) with nonstick cooking spray; set aside.
- Punch the dough down and divide the dough into 30 pieces.
- Working quickly, roll the dough into balls and place them on the prepared baking sheet (make 6 rows of 5).
- Cover the dough with a kitchen towel again. Move the oven rack to the middle position and preheat the oven to 400 degrees F.
- Once the oven has preheated, remove the towel from the rolls and bake for 15-18 minutes, or until the rolls are light golden brown on top and baked through.
- Melt 4 Tablespoons of butter in a small bowl, and brush the tops of the rolls with the butter. Serve.


Amanda says
This Large Batch Rolls hearty and comforting. A perfect meal for any day.
LMG says
Can you freeze the dough and cook after thawing (and rising)?
Jess Jankowski says
We have not tried it but if you try it, you might want to flash freeze them on a sheet pan and freeze until solid and then put them in a Ziploc bag with lots of headspace. You will need to then allow more time for thawing and rising before baking.
Pat says
I love making dinner rolls for the freezer, and 30 at a time is wonderful! Thank you!
Jess Jankowski says
Thanks so much for letting us know!
MacKenzie says
Hello! About how many ounces would 1 roll be?
Jess Jankowski says
Hi MacKenzie, we have not weighed them but they are a bigger roll. I would guess they are somewhere between 2-3 ounces. Thanks!
Sheryl says
Is it possible to cut the re pie in 1/2? I’m looking forward to making these. Your French bread recipe is a favorite!
Jillian says
Hi Sheryl, you can definitely cut the recipe in half. Enjoy!
Nikki says
Is it too possible to make these in a bread maker?
Jess Jankowski says
Hi Nikki, I am sure you could do it in the bread maker but we have not personally tried it yet. It makes a lot of dough so it may not all fit in a bread maker, depending on the size. We say give it a go and let us know how it turns out!
Calvin says
I like the size of dinner rolls, haven’t tried making my own, but the asian kinds are semi sweet, these are great too.
Jess Jankowski says
Try them out and let us know how it goes. Homemade rolls are the best!
Wendy Collins says
I’ve always been intimidated by homemade rolls. I finally tried them for the first tiime ever for Easter using this recipe. They turned out so good! Even my mother-in-law, who makes great rolls, loved them and asked for the recipe!!
Jess Jankowski says
I LOVE that these were so easy for you! It will be an Easter to remember for many reasons!
Sue says
My favorite kind of roll, and they make the BEST leftover turkey sliders!!
Jess Jankowski says
Totally! Thanks for stopping by!
Calleigh says
Who can resist these buttery, soft dinner rolls? I would love eating these in one sitting., now I’m drooling
Jess Jankowski says
It’s so hard to only have 1 or 6 in my case!
Jessica Formicola says
These dinner rolls are absolutely amazing! Thanks so much for sharing the recipe!
Jess Jankowski says
You are so welcome! Thanks for stopping by!
Adrianne says
These dinner rolls look fab and I love how cheap they are for each individual portion. There are so many parties and bbqs coming up where these will be perfect for. Can’t wait to give them a go. Thanks!
Jess Jankowski says
Can’t wait to hear how you like them! Thanks for stopping by.
Adriana says
Homemade bread is always the best, requires a bit of effort but so worth it. Making your recipe for dinner rolls this Thanksgiving!
Jess Jankowski says
So worth it!! Happy Thanksgiving!
Anita says
The honey and butter take this simple dinner rolls over the top. And it’s enough to last several days. 🙂
Jess Jankowski says
The honey and butter is my favorite part!
Sapana says
These dinner rolls turned out perfect! So quick and easy to make.
Jess Jankowski says
Awesome! Glad you loved them!
Katie says
Made this for the family and it was a hit! We all loved it!
Jess Jankowski says
Woo hoo! Thanks for letting us know!
Nellie Tracy says
Absolutely perfect! Can’t wait to make these for Thanksgiving!
Jess Jankowski says
Come back and tell us how you liked them!
Suzy says
These came out so good! Love how they are ready so quickly!
Jess Jankowski says
Yay! So glad you liked them and thank you for the review!
Katie says
So awesome to have on hand for those busy weekday nights! We all love these.
Jess Jankowski says
So glad you liked them! Thank you for the review!